Getting started
This page has you simulate a first example, then run your own program. It assumes the library is downloaded.
1. Open the library
In OMEdit, File → Open Model/Library File(s)…, then select MicroPythonMCU/package.mo in the downloaded folder: the library appears in the class browser. If you installed it as a system library: File → System Libraries → MicroPythonMCU (the different ways).
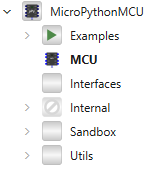
| Package | Contents |
|---|---|
MCU |
The microcontroller, to drop into your diagrams |
Peripherals |
Components to wire to its pins: LED, displays, serial devices, I2C devices, weighing chain |
Examples |
37 ready-to-simulate models (see Examples) |
Interfaces, Internal |
Connectors and internal machinery: no need to touch them |
2. Simulate BasicBlink
- Open
MicroPythonMCU.Examples.BasicBlink(double-click). - Run the simulation (Simulate button, green arrow).
- In the Plotting tab, tick
mcu.GP0.v: the voltage of pinGP0alternates between 0 V and 3 V, one second out of two.
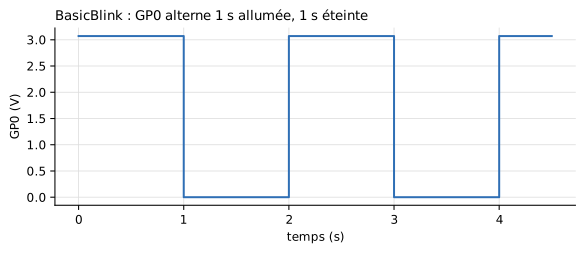
Figure labels are in French: « temps » = time.
The high level is ≈ 3.07 V rather than 3.3 V: the pin has a 100 Ω output resistance, and the LED wired to it draws current. The circuit is genuinely solved.
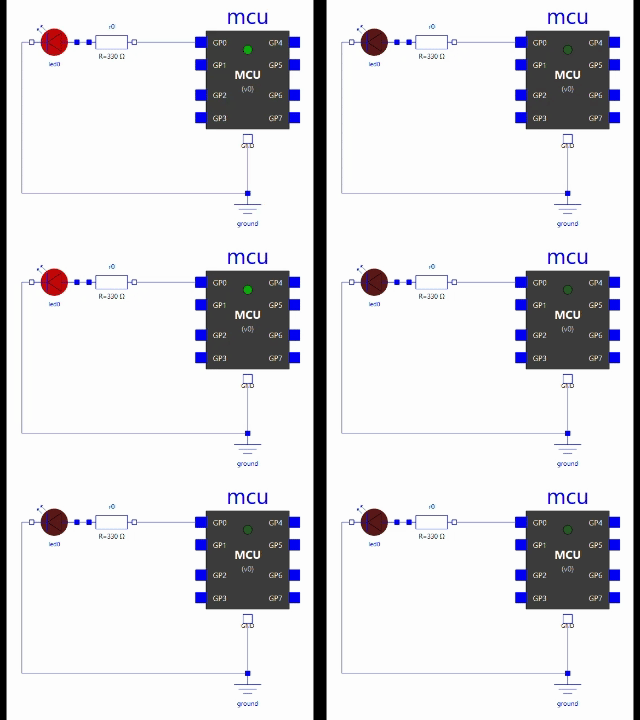
Go back to the Diagram view of the result and move the time slider: the external LED and the on-board LED dot switch on and off.
3. Read the program being run
The MCU runs the file given by its Script path parameter (scriptPath). In BasicBlink, it is the default program, Resources/Scripts/MCU/demo.py:
from machine import Pin
import time

led = Pin(0, Pin.OUT)
builtin = Pin(Pin.LED, Pin.OUT)

while True:
    led.on()
    builtin.on()
    time.sleep(1)
    led.off()
    builtin.off()
    time.sleep(1)
The loop is infinite and each sleep lasts one second, yet the simulation runs almost instantly. The script's time is simulated time: time.sleep(1) hands control back to the solver, which jumps one second ahead. The simulation stops at the model's Stop Time, not at the end of the script.
4. Run your own program
- Create a new model (File → New → Model).
- Drag a
MicroPythonMCU.MCUinto it from the browser, and aModelica.Electrical.Analog.Basic.Groundconnected to the microcontroller'sGNDpin. - Wire the circuit to drive to pins
GP0toGP7. For instance a 330 Ω resistor in series with aMicroPythonMCU.Peripherals.LEDbetweenGP0and ground. - Write your program in a
.pyfile, anywhere on disk. Starting fromdemo.pyis a good idea. - Double-click the
MCUand, in the Script path field, pick your file with the … button. - Set the duration to simulate (Simulation → Simulation Setup → Stop Time) and simulate.
Where do print() calls go?
Everything the script writes with print() shows up in OMEdit's simulation output window, in simulated-time order.
An error in the script stops the simulation
An uncaught Python exception stops the simulation, and the Python traceback (file, line, message) is shown in the log. Results remain available up to the time of the error. The Program.Error example shows this.
5. Next steps
- The MCU block: all its pins and parameters.
- machine / time API: what your program can call.
- Peripherals: LED, displays, serial devices, I2C, weighing.
- Examples: a ready-to-simulate model for each feature.